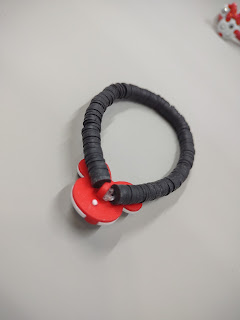
Easy and inexpensive bracelet idea!
Thinking ahead to a Disney family trip I had an idea to make some cute Disney gifts for my cousins. Using some stretchy cord, clay beads, and these decorative Minnie Mouse themed buttons I was able to quickly make some cute bracelets to wear to the parks.
You can make some too in only a few steps. For this project the supplies you'll need are stretchy cord (I used Stretch Magic), clay bead discs, and decorative buttons that have shank backs (I used these Disney buttons from Dress It Up buttons). Shank back buttons are the ones that have the loop behind them, you will need these so that you pass the cord through the loop.
First, decide the wrist size that you will be making the bracelet for. Make sure that you have enough beads to cover the length of the wrist size you measured. Then cut a piece of the stretchy cord about three inches longer than the size of the wrist and start looping in the clay beads. You want the length of the section with the clay beads to be approximately the size of the wrist.
Loop through all the clay beads up to the size of the bracelet that you need and then add the button and pass the elastic cord through the loop. Make a double knot and perhaps an extra knot for good measure immediately after the loop so that the knots will be covered by the button. Cut off the excess cord and voila your bracelet is done.
This was my first attempt at making them and it was so quick and easy that I plan on coming up with some variations on these with different themes and elements to see what they came out like. Are you going to try this out?


Comments
Post a Comment